To create a bootable USB media, start the ESRBOOT utility and follow a few simple steps:
•Accept the ElcomSoft end user license agreement
•Enter your license key
•Select an option for creating a bootable USB drive
•Insert the USB device you're about to make bootable (warning: all data on this disk will be deleted!)
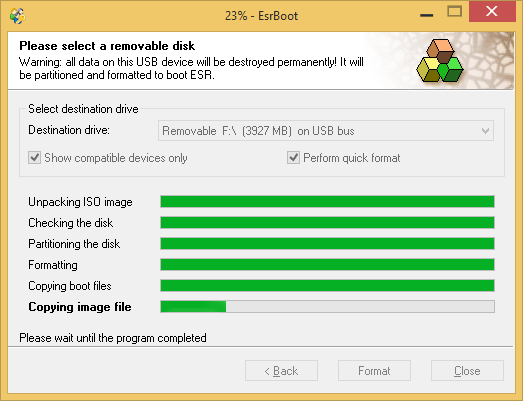
•Select the USB device from the Destination drive drop-down box. Select Show compatible devices only to filter out internal storage devices; you may wish to switch it off only if ESRBOOT does not show your removable disk.
•The program verifies that the device can be configured to boot ESR; creates a special partition; creates a logical drive; formats the drive; makes this drive bootable; then copies the files (Windows PE and ESR itself).
Please note: when creating a bootable media, ESR offers the choice of three boot options: BIOS, UEFI x64, and UEFI x32. You must select the correct option for the target computer. A vast majority of modern computers use UEFI x64, which is the default option. For legacy PCs, select BIOS. The last option, UEFI x32, is used in a few special cases such as some thin-and-light devices and nettops built on certain generations of the Intel Atom platform which, while supporting 64-bit instructions, are limited to the 32-bit instruction set.